
Area counting analysis is one of the traffic analysis method that is normally used in shopping mall, to understand the distribution of visitors throughout the mall and the utilization of the space. Traffic flow analysis provides evidence for management to adjust rental rates of tenants throughout popular areas. Shopper profiling per area also provides showcases where visitors go after visiting a promotional event to offer objective evidence on retail opportunities available on retail tenants.
21.1 Area Counting
A shopping mall can be partitioned into a few area to observe the footfall at that specific area. The area specified required to be configured in FootfallCam Analytic Manager to indicate the in line and out line of the footfall counter. (For more information, please refer to Chapter 7: Accuracy Audit.)
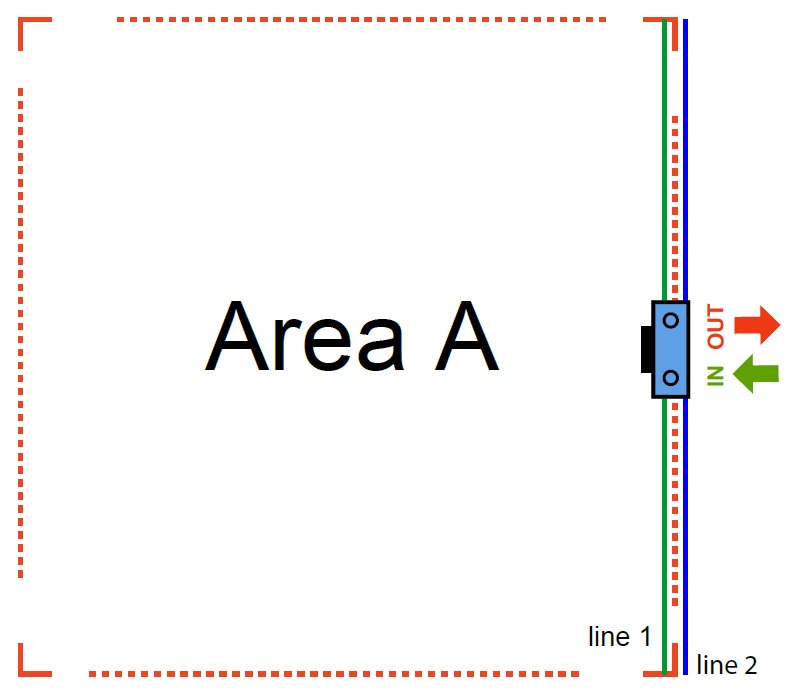
In Area A, line 1 (green line) indicates In line while line 2 (blue line) indicates Out line.

If an area contains more than one counter, then all the counters should be define during area configuration.
The footfall counting data for Area A will be the summation of footfall for counter C1, C2 and C3. Therefore if any of the counters is not define during area configuration, the data will be inaccurate.
The same counter can be used to define two areas.
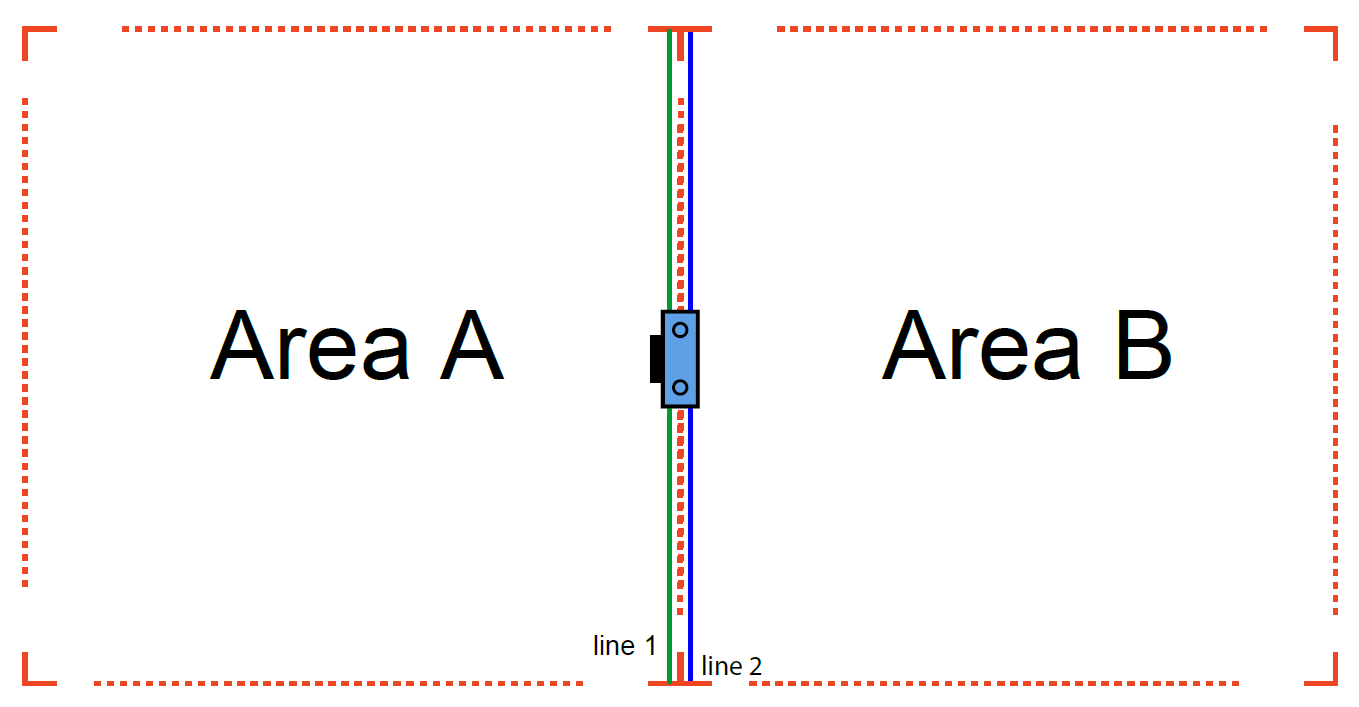
In this situation, the same counter is used for both areas.
For Area A, line 1 (green line) indicates In line while line 2 (blue line) indicates Out line.
For Area B, line 2 (blue line) indicates in line while line 1 (green line) indicates Out line.
This definition will be useful for area configuration in the next section.
21.2 Area Configuration
STEP 1 - Access to FootfallCam Analytic Manager V8™: http://portal.footfallcam.com/Account/Login via Google Chrome.
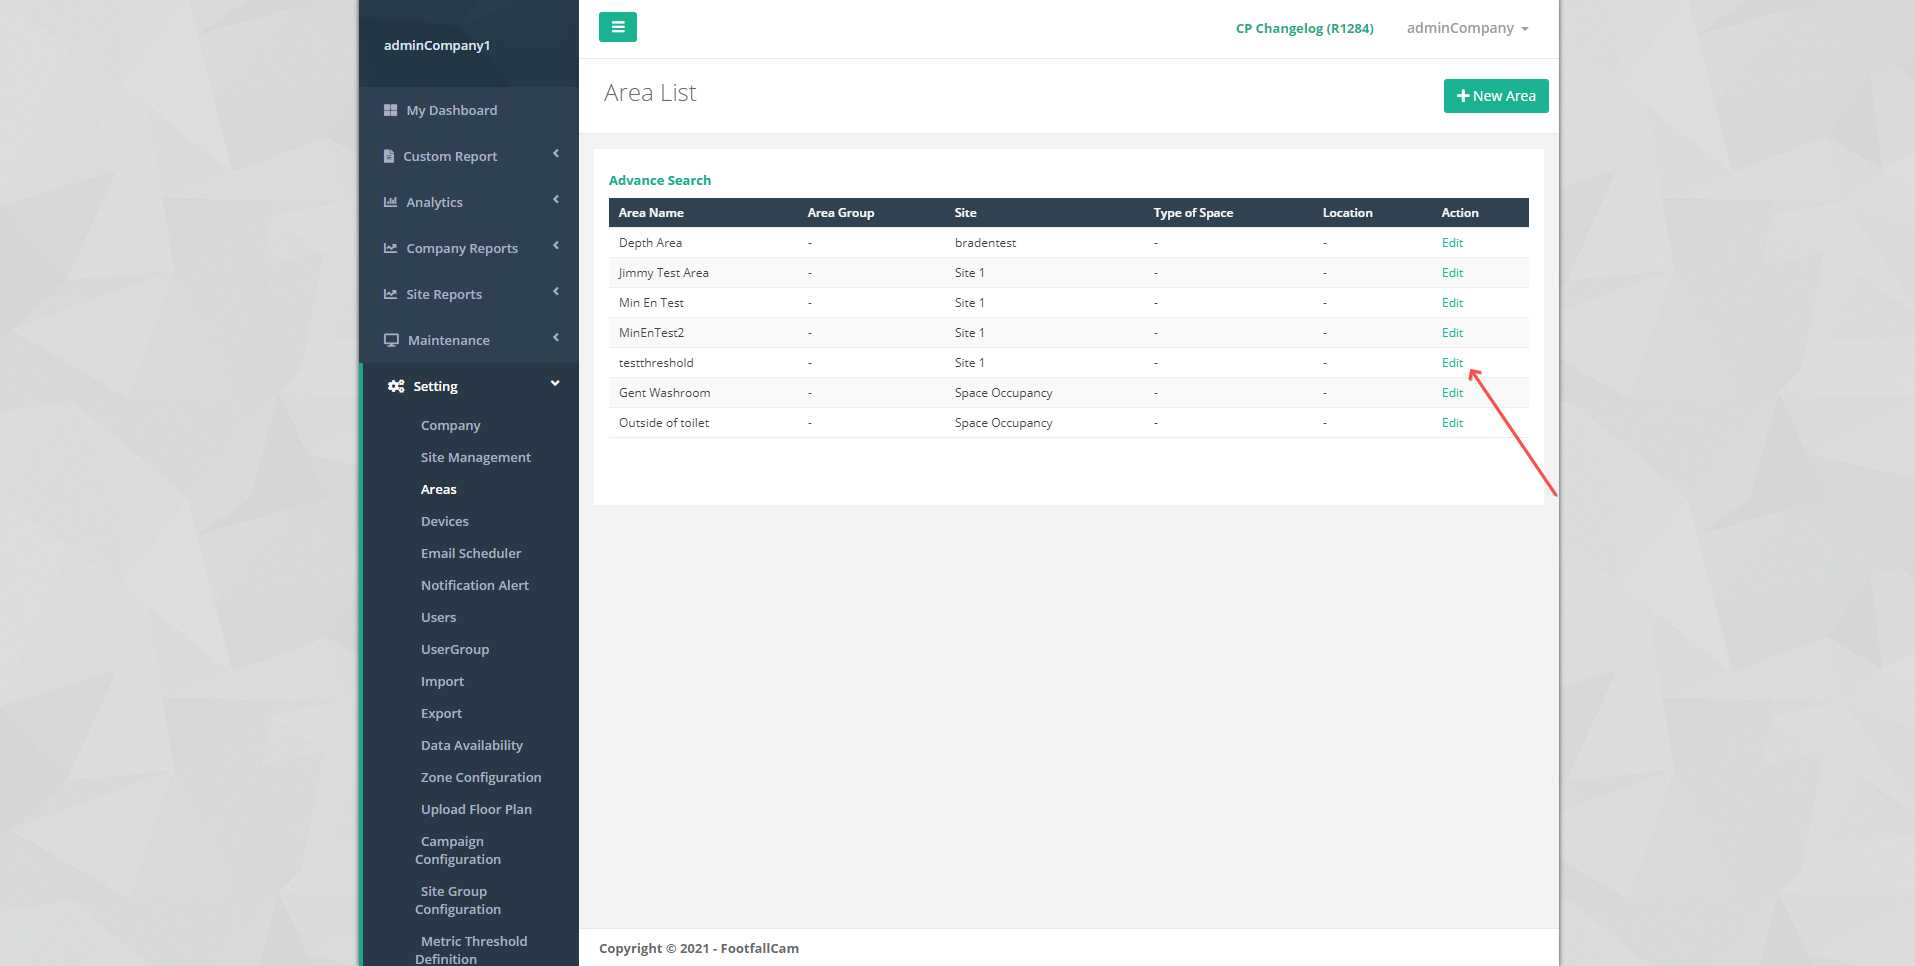
STEP 2 - Click Setting > Area to access the Area List page.
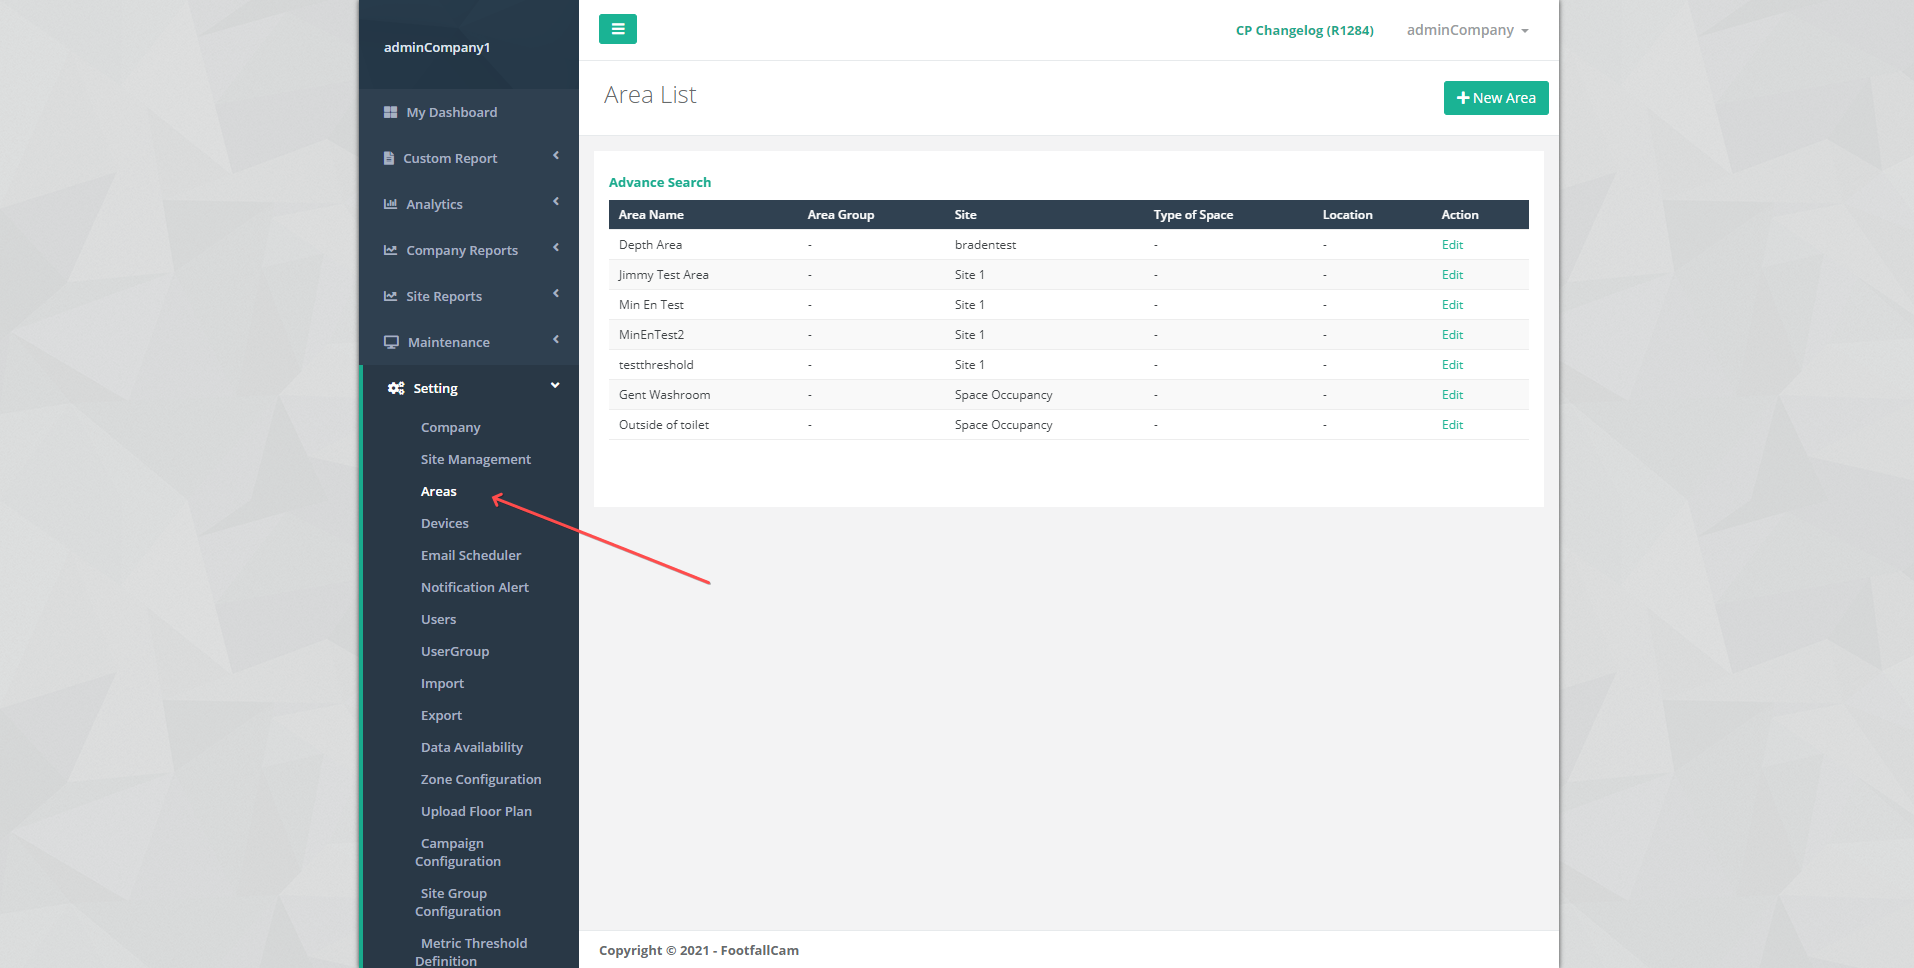
| Item | Description |
| 1. Area Name | Display the area name. |
| 2. Area Group | Display the area group. |
| 3. Site | Display the site of the area. |
| 4. Type of Space | Display the type of space of the area. |
| 5. Location | Display the location of the area. |
| 6. Action | To access the Area Configuration page for the setting. |
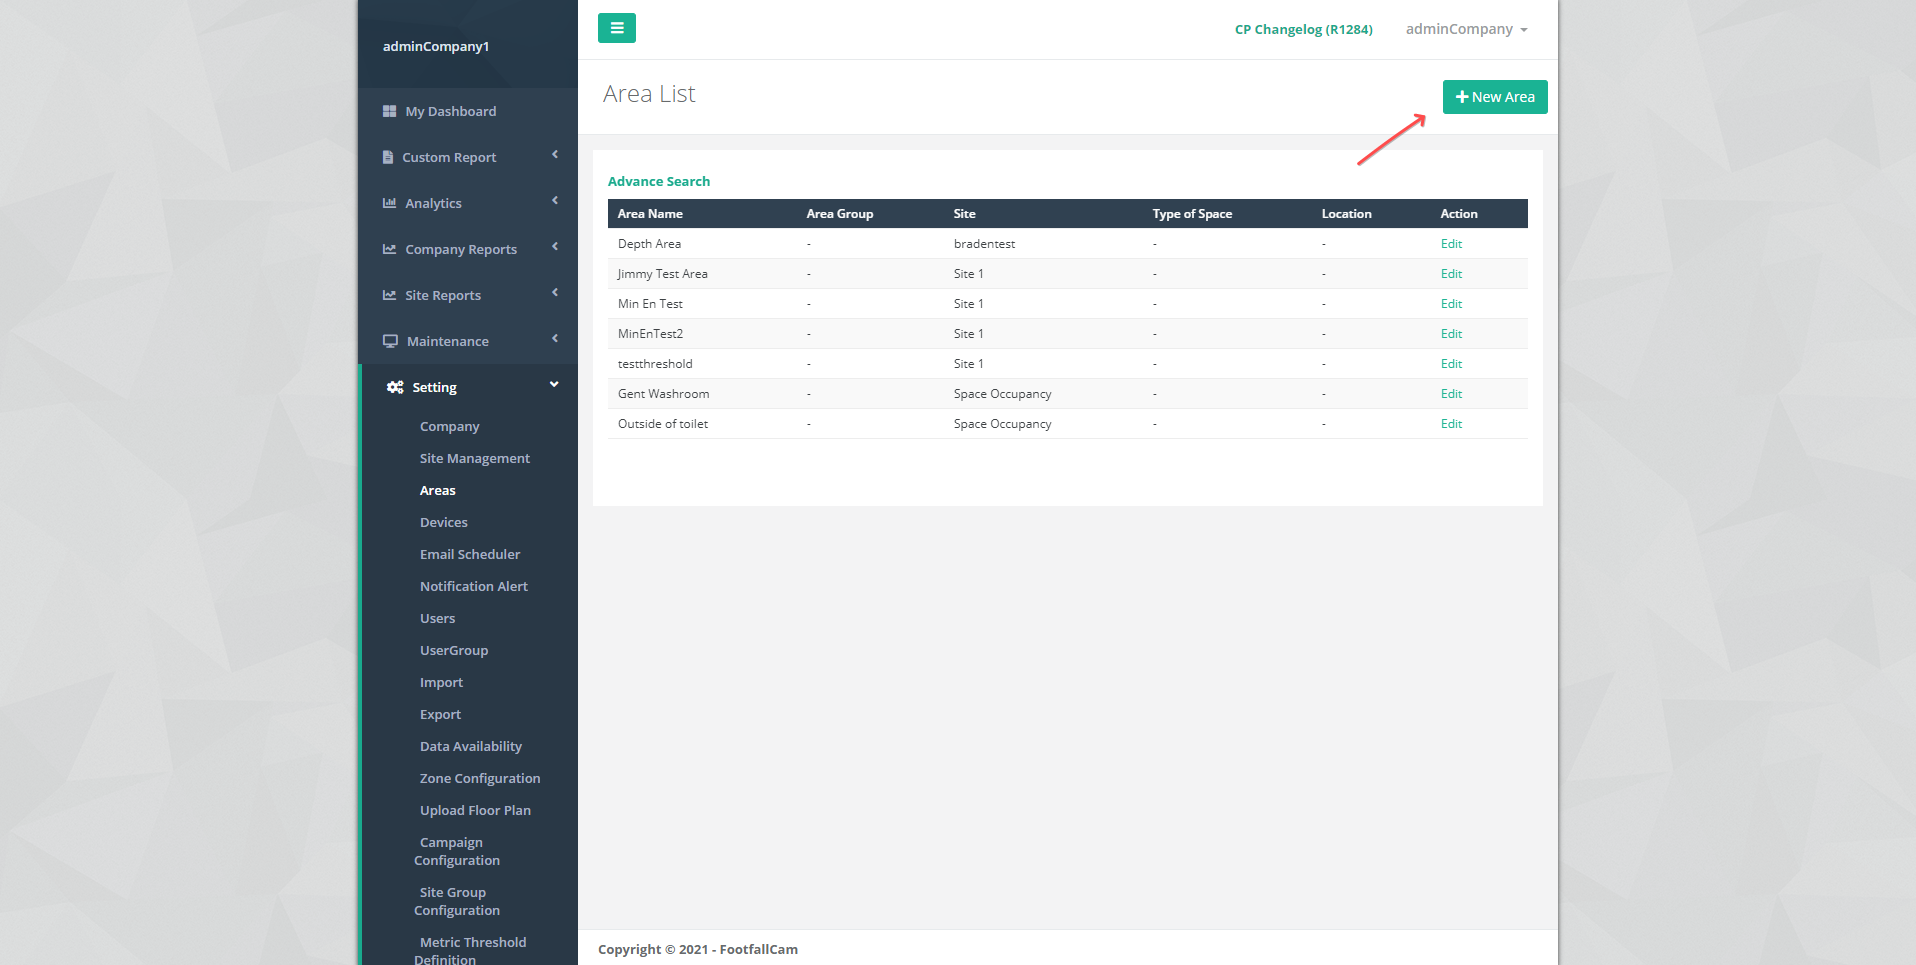
21.2.1 Create New Area
STEP 1 - Access to FootfallCam Analytic Manager V8™: http://portal.footfallcam.com/Account/Login via Google Chrome.
STEP 2 - Click Setting > Area to access the Area List page.
STEP 3 - Click +New Area button to create a new area.
STEP 4 - Fill in relevant information for the required fields.
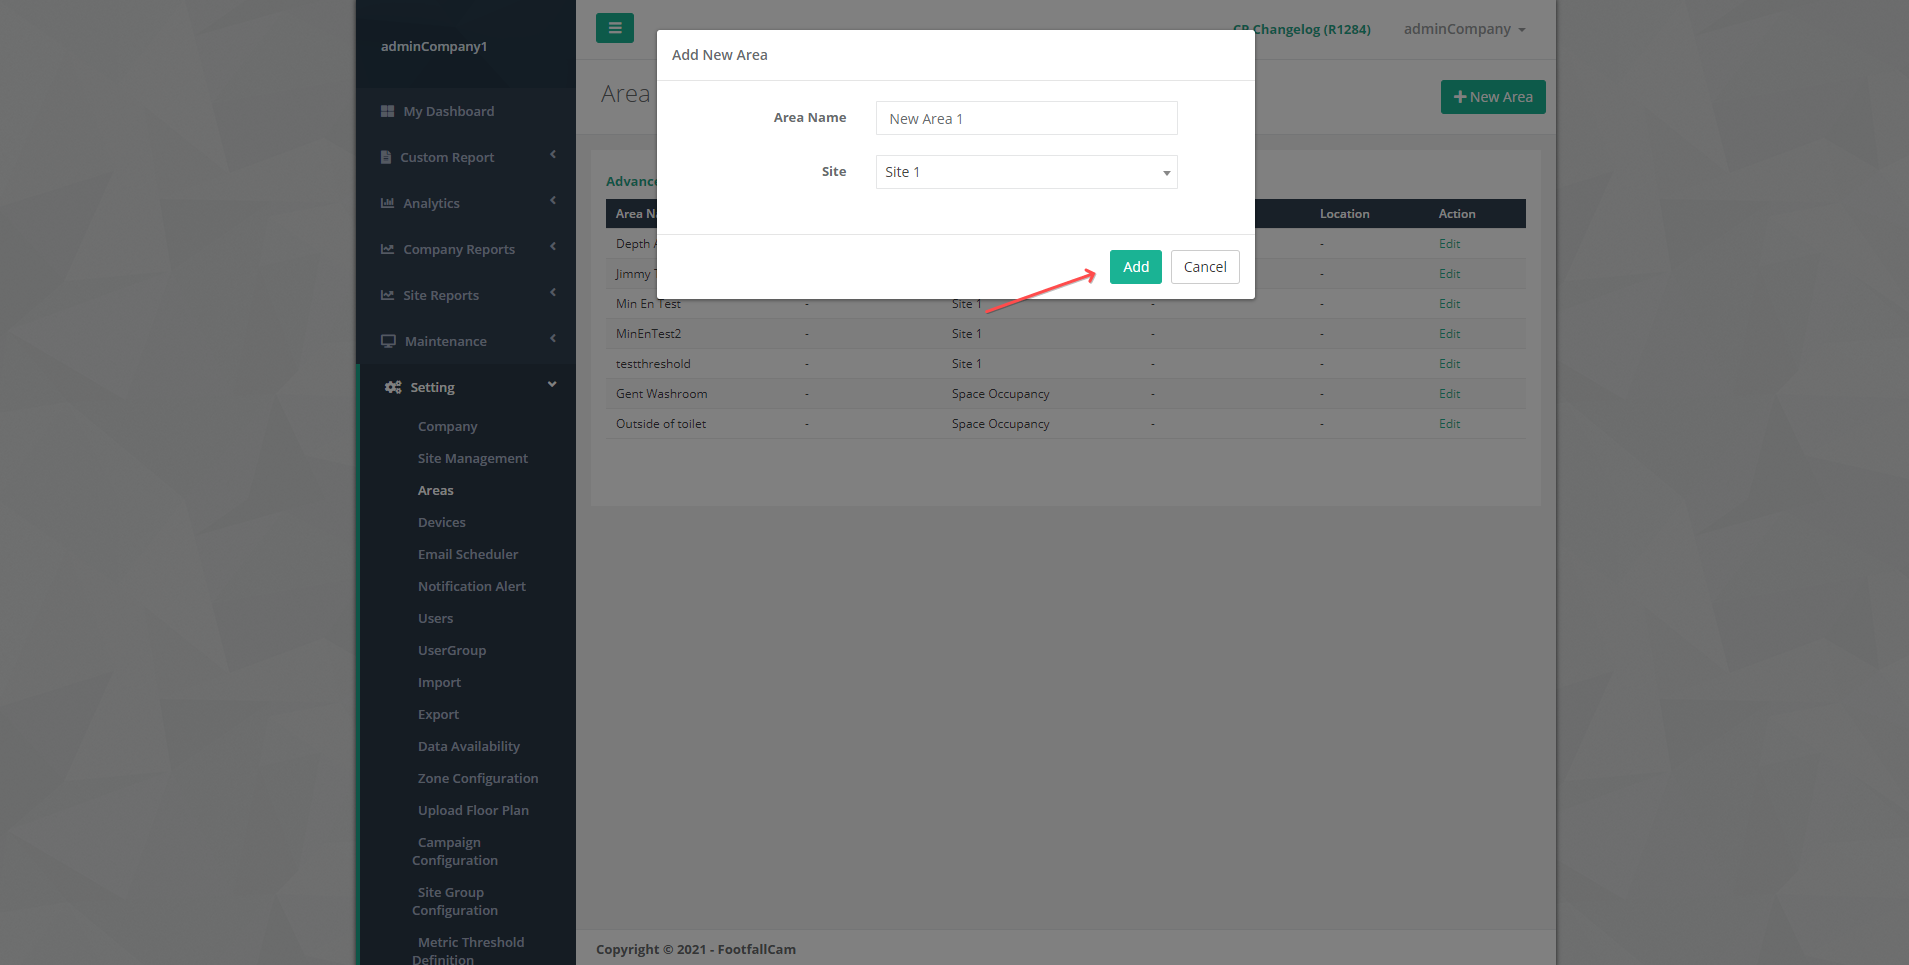
| Field | Description |
| 1. Area Name | Enter your preferred name of the area. |
| 2. Site | Select the Site to add the area. |
STEP 5 - Click Add button to add the new area. It will be redirect to Area Configuration page.
STEP 6 - Complete the process by entering all the required fields in Dataset tab (Refer to Section 21.2.4 Dataset Configuration for Dataset setting and Section 21.2.5 Threshold Configuration for metric threshold setting).
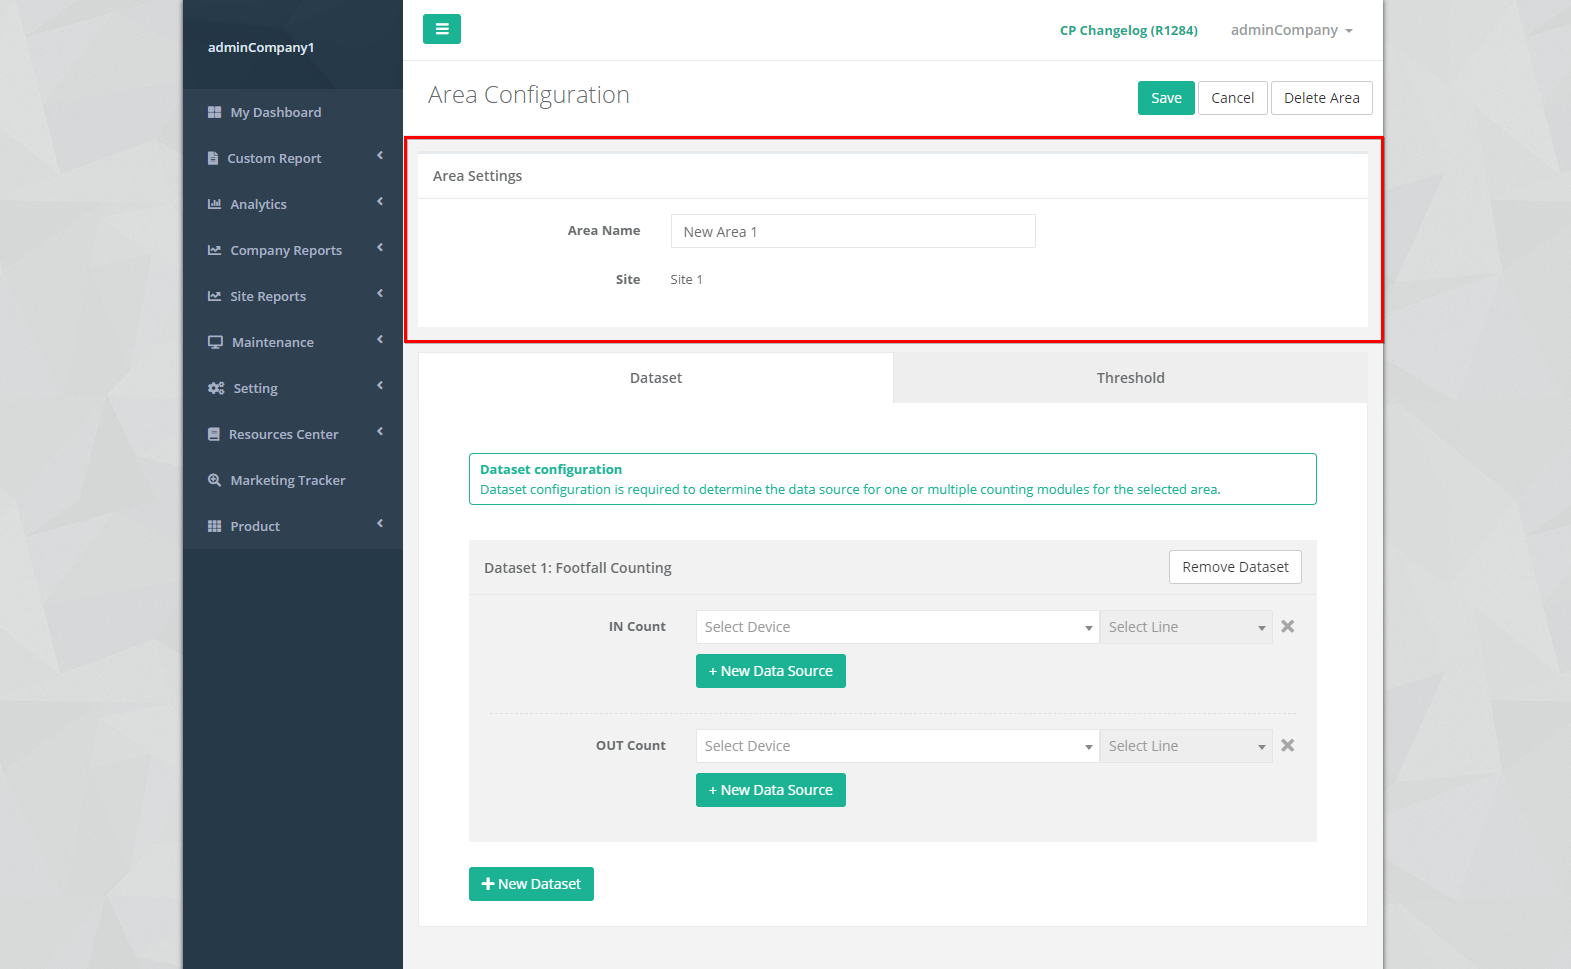
| Item | Description |
| 1. Area Name | Edit the name of the area that you wish to change. |
| 2. Site | Display the site of the area. |
STEP 7 - Click on Save button to create the area.
21.2.2 Manage Area
STEP 1 - Click Setting > Area to access the Area List page.
STEP 2 - Select the the area you wish to update and click on the Edit button.
STEP 3 - Update the relevant information and click Save to save the changes. Click Cancel if you wish to exit the page.

21.2.3 Delete Area
STEP 1 - Click Setting > Area to access the Area List page.
STEP 2 - Select the area that you wish to edit and click on the Edit button.
STEP 3 - Click Delete to delete the area. The deleted area will no longer be reflected in the table located at the Area List page.

21.2.4 Dataset Configuration
STEP 1 - Click + New Dataset to trigger the Add Dataset pop up.
STEP 2 - Select the Counting Module and click Save button to add the dataset.

| Item | Description |
| 1. Counting Module |
Select the counting module type that you wish to add.
|
| 2. Add Button | Add new dataset section. |
| 3. Cancel Button | Close the add dataset dialog box. |
21.2.4.1 Footfall Counting

| Item | Description |
| 1. Dataset Section | Display the details of dataset. |
| 2. +New Dataset | Add new dataset section. |
| 3. Remove Dataset | Remove the dataset that you wish to remove. |
| 4. Data Source | Display the details of data source (Device & Line). |
| 5. +New Data Source | Add new data source row. |
| 6. Remove Data Source | Remove the data source that you wish to remove. |
| 7. In Count | Select the device of that area, then select the line to count as in. |
| 8. Out Count | Select the device of that area, then select the line to count as out. |
21.2.5 Threshold Configuration
Metric threshold is a feature to set a threshold to indicate the region of interest or to alert user when a threshold is breached. User can set metric threshold for area in Area Configuration or in Metric Threshold Setting, the same threshold will be shared between these two pages.
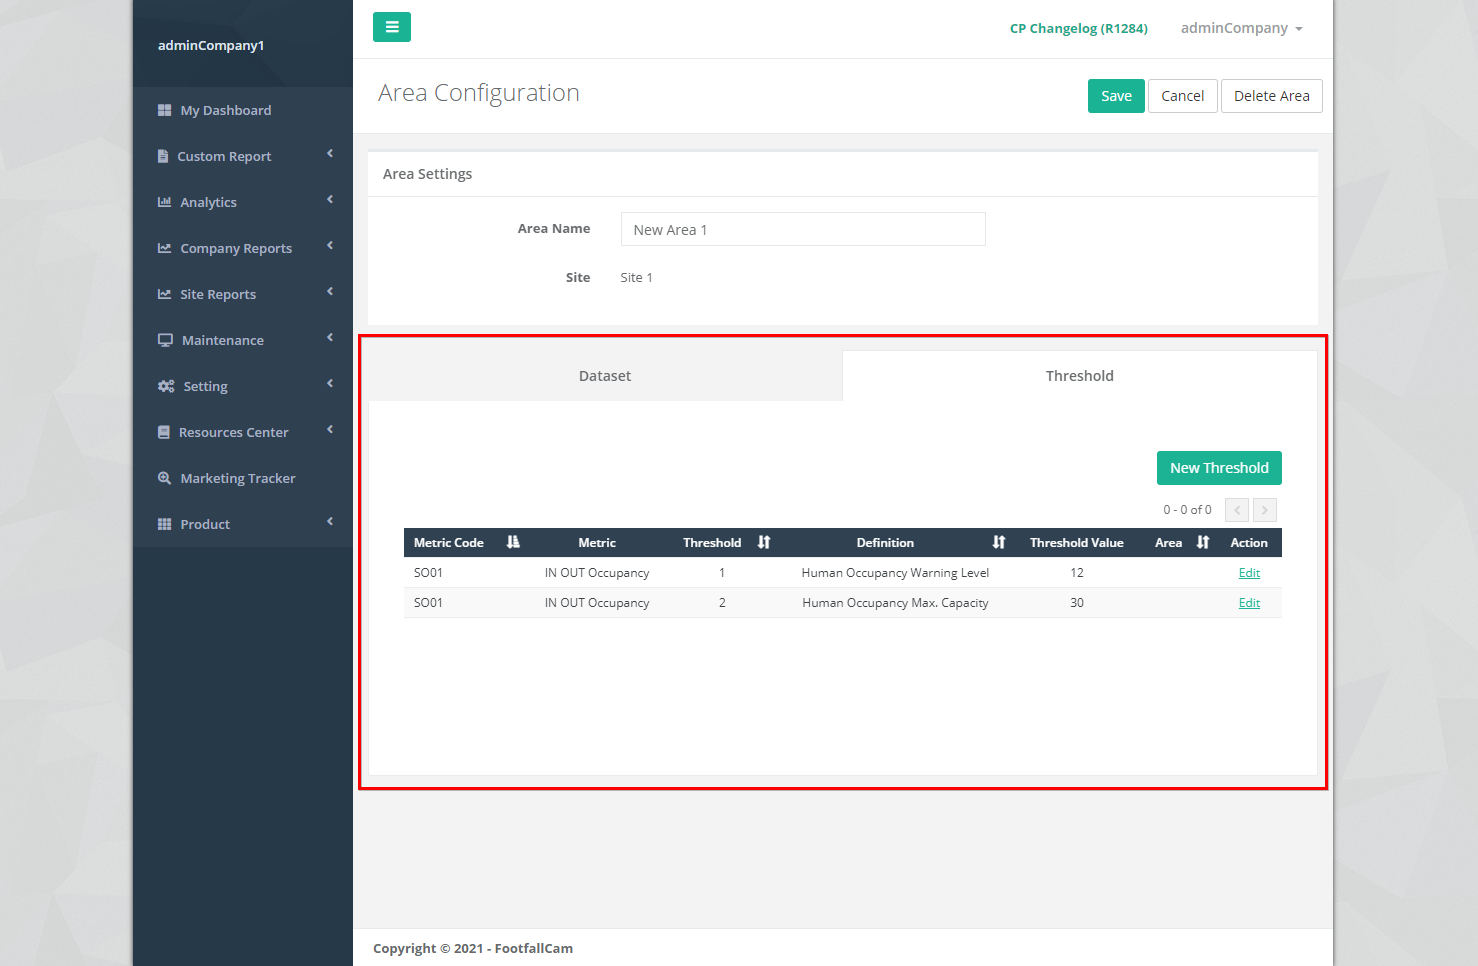
| Item | Description |
| 1. +New Threshold | Open the metric threshold settings dialog box. |
| 2. Metric Code | Display the metric code for the metric. |
| 3. Metric | Display the metric type name. |
| 4. Threshold | Display the threshold type. |
| 5. Definition | Display the metric and threshold combination. |
| 6. Threshold Value | Display the value for the metric threshold. |
| 7. Area | Display the area name that the threshold applied to. |
| 8. Action | To access the metric threshold setting form. |
21.2.5.1 Create New Threshold
STEP 1 - Click New Threshold to trigger the Metric Threshold Setting pop up.
STEP 2 - Fill in relevant information for the required fields and click on the Save button.
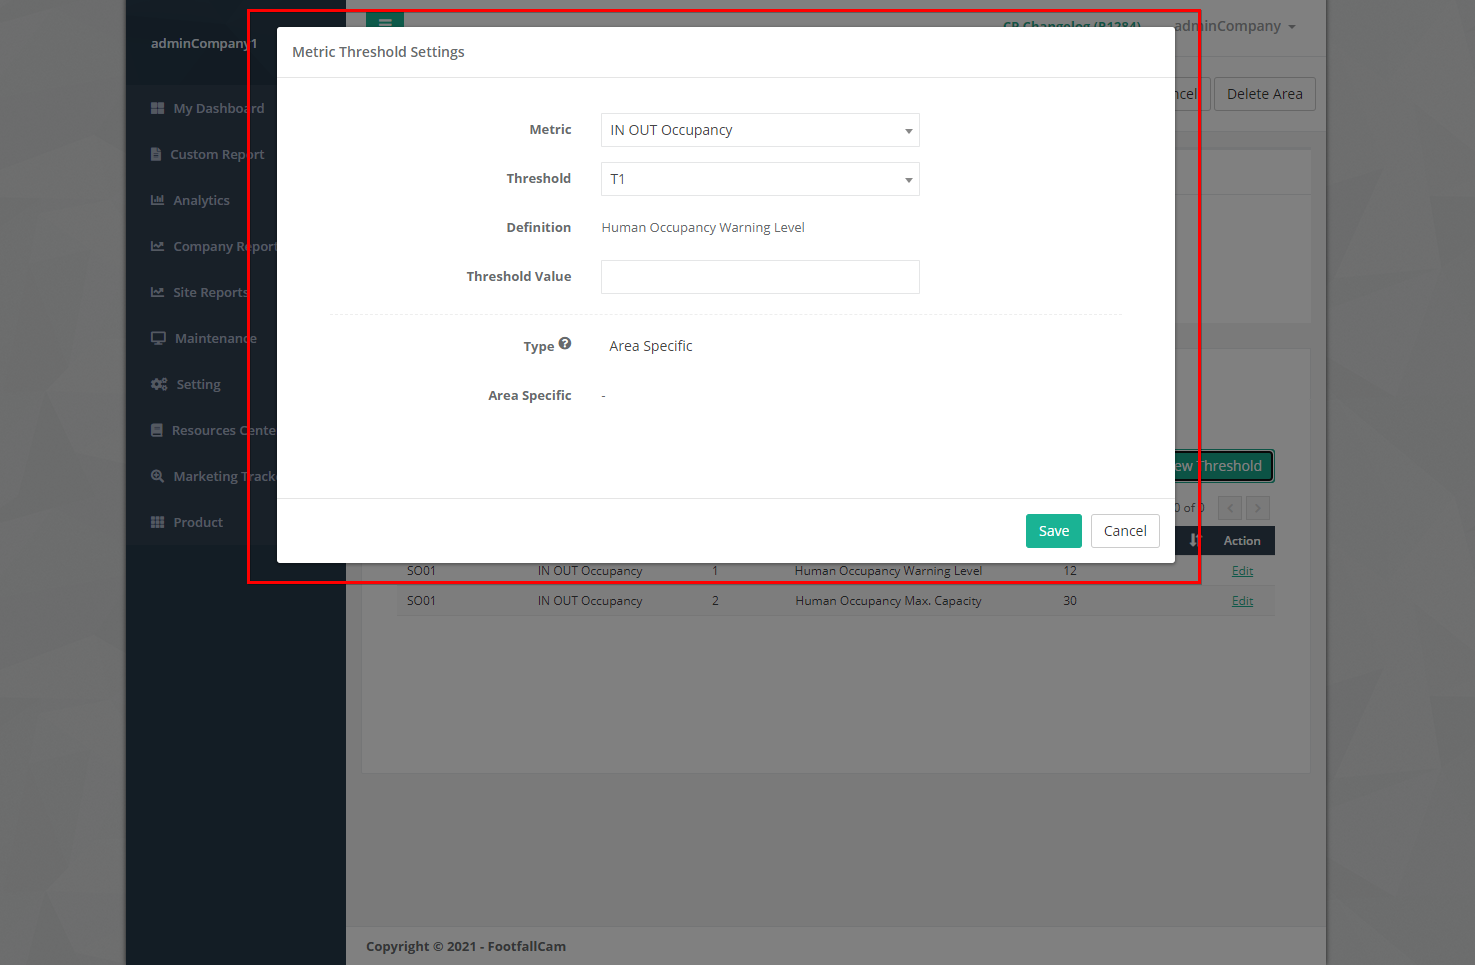
| Item | Description |
| 1. Metric | Select the metric type. |
| 2. Threshold | Select the threshold type. |
| 3. Definition | Display the definition for the selected metric type and threshold type set in Metric threshold definition. |
| 4. Threshold Value | The value for the metric threshold. |
| 5. Type | Display the type of the threshold level, which is Area Specific. |
| 6. Area Specific | The area that the threshold is applied to. |
| 7. Save Button | Save the metric threshold settings. |
| 8. Cancel Button | Close the metric threshold settings dialog box. |
21.2.5.2 Manage Threshold
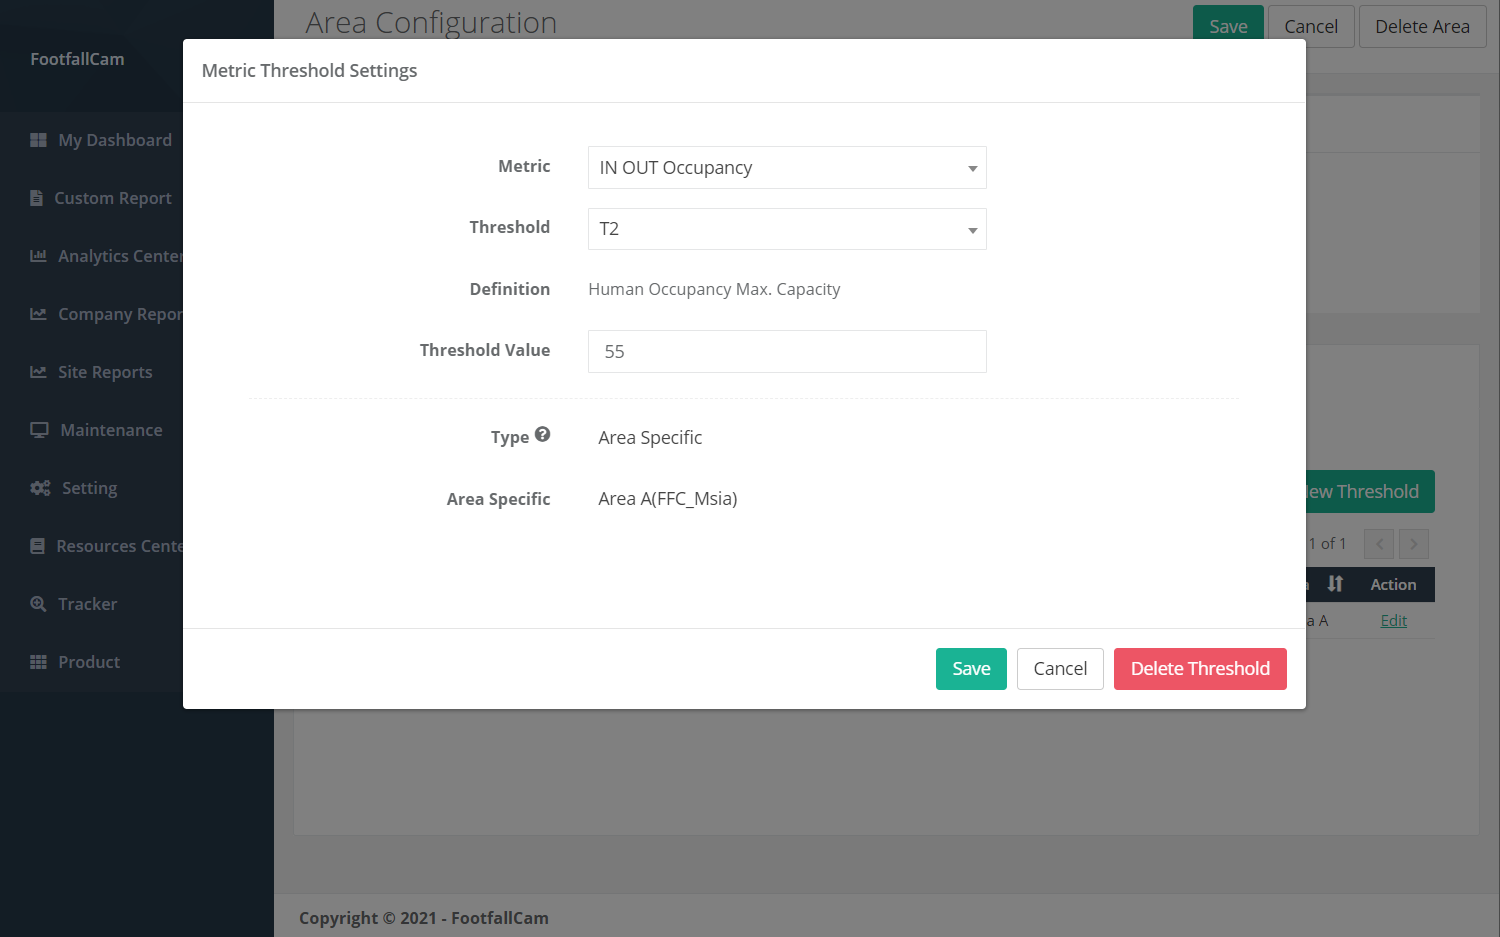
STEP 1 - Navigate to the threshold you wish to manage and click the Edit button.
STEP 2 - Update the field(s) you wish to update and click on Save button to save the changes.
21.2.5.3 Delete Threshold
STEP 1 - Navigate to the threshold you wish to delete and click the Edit button.
STEP 2 - Click on Delete button to remove the metric threshold. The deleted metric threshold will no longer be reflected in the table in Threshold at Area Configuration page and the table in Metric Threshold Setting.
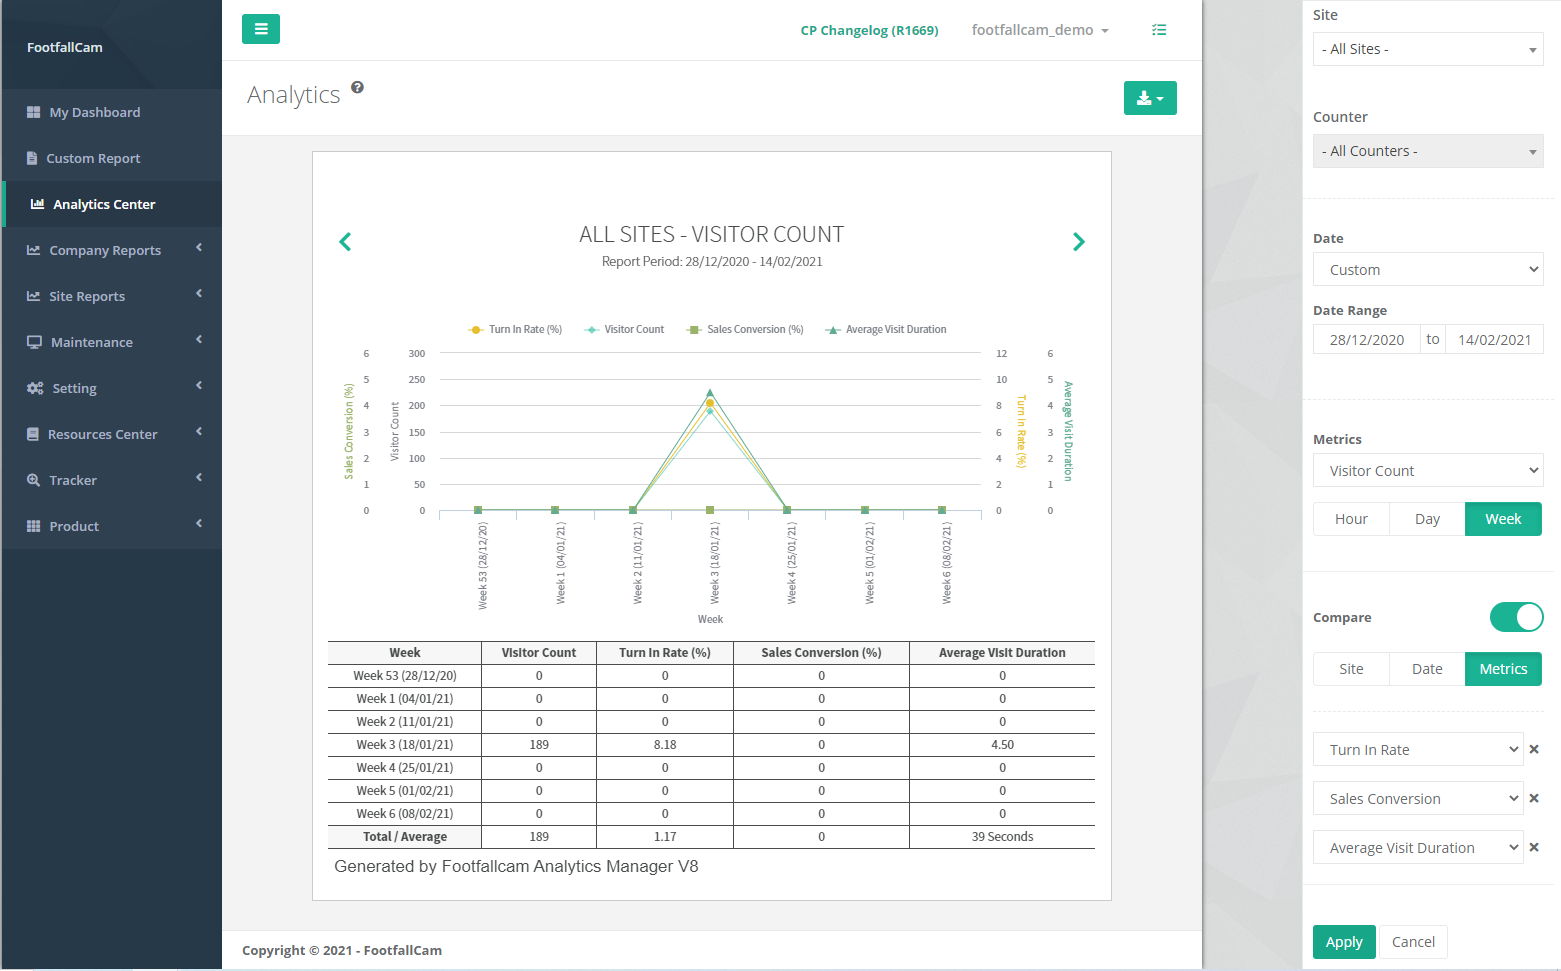
21.3 Analytics Center
After area configuration, the analysis for the area counting data can view in Analytics Center. This section focuses on the steps to setup area analytics in Analytics Center.
STEP 1 - Access to FootfallCam Analytic Manager V8™: http://portal.footfallcam.com/Account/Login via Google Chrome.
STEP 2 - Click Analytics Center at the left toolbar to access Analytics page.
STEP 3 - Select Area at Type field at the Options toolbar, update the following field and click Apply.
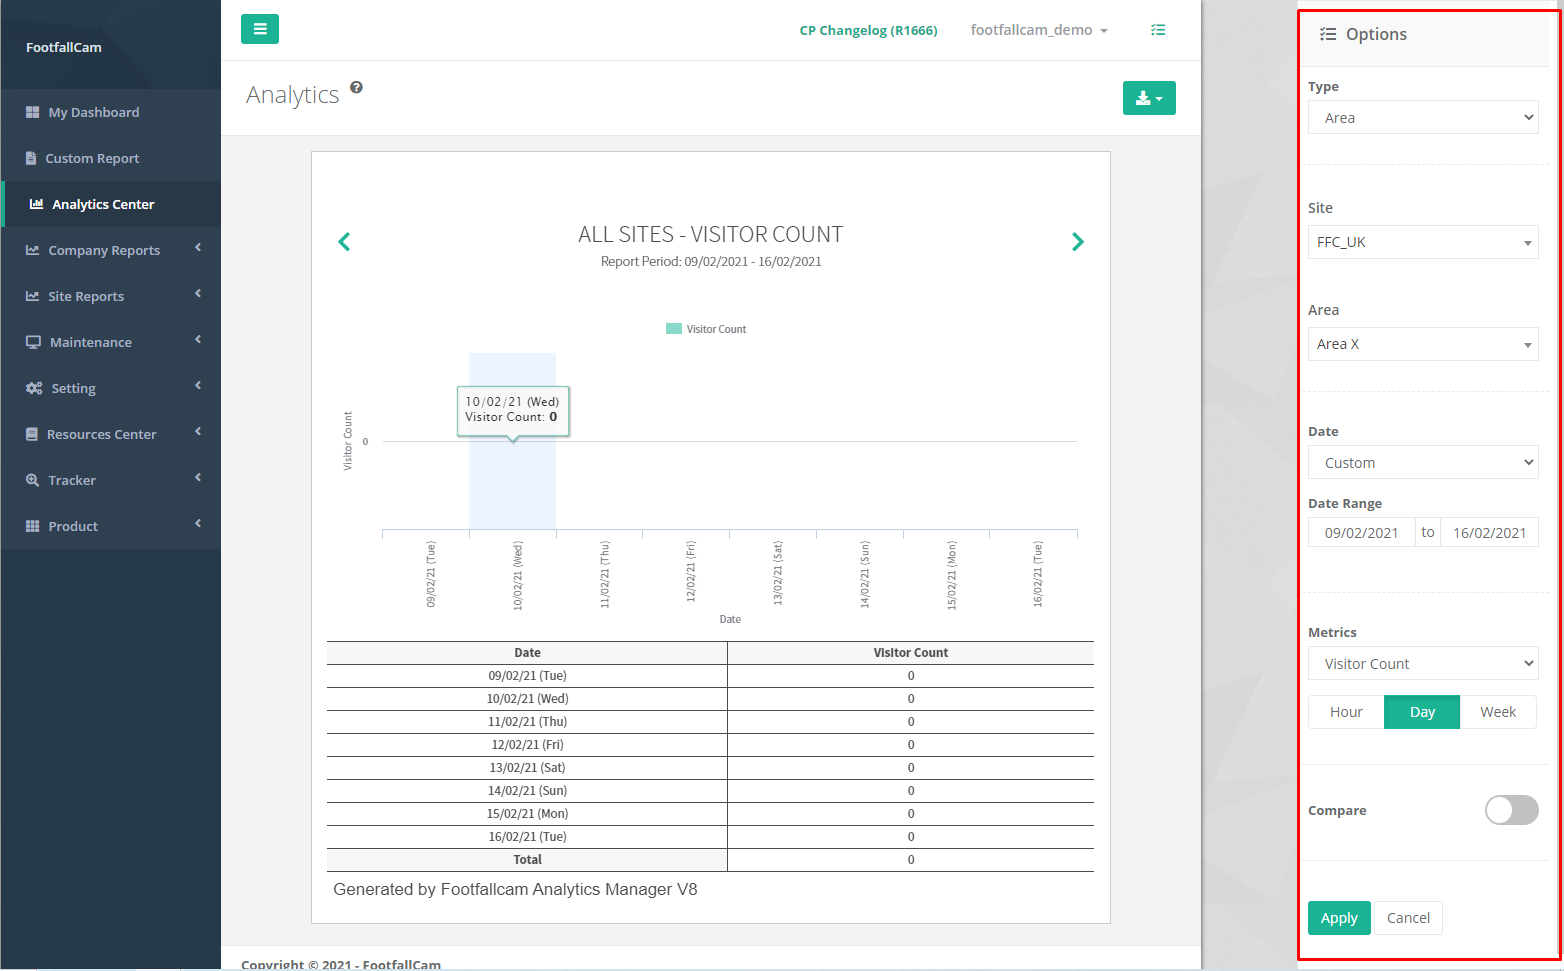
| Field | Description |
| 1. Type | Select Area to view Area counting analysis. |
| 2. Site | Select the site to be displayed. |
| 3. Area | Select the area to be displayed. |
| 4. Date | Select the date range type to be displayed. |
| 5. Date Range | Update the date range for custom date. |
| 6. Metric | Select the metric to be displayed. |
| 7. Aggregation | Select the aggregation by hour, day or week. |
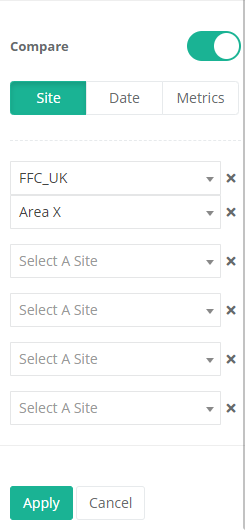
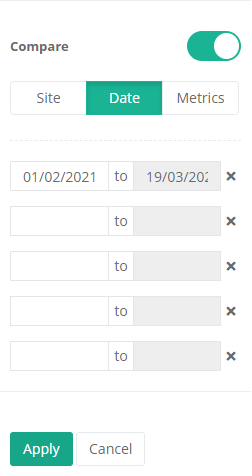
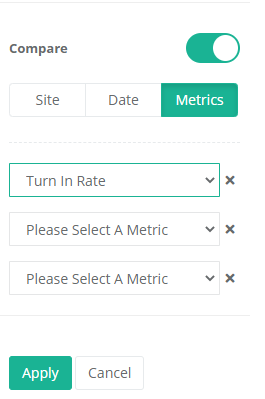
| 8. Compare | Indicator to allow comparison. |
STEP 4 - Toggle the Compare indicator to allow comparison. Select the comparison type and update the fields accordingly and click Apply.
 |
 |
 |
| Compare site. Select the site and respective area for comparison. |
Compare Date. Select the date range for comparison. |
Compare Metrics. Select the metrics for comparison. |
STEP 5 - View the analysis graph at the middle of the analytics page.