


5.1 User Group Setting
5.1.1 Create User Group
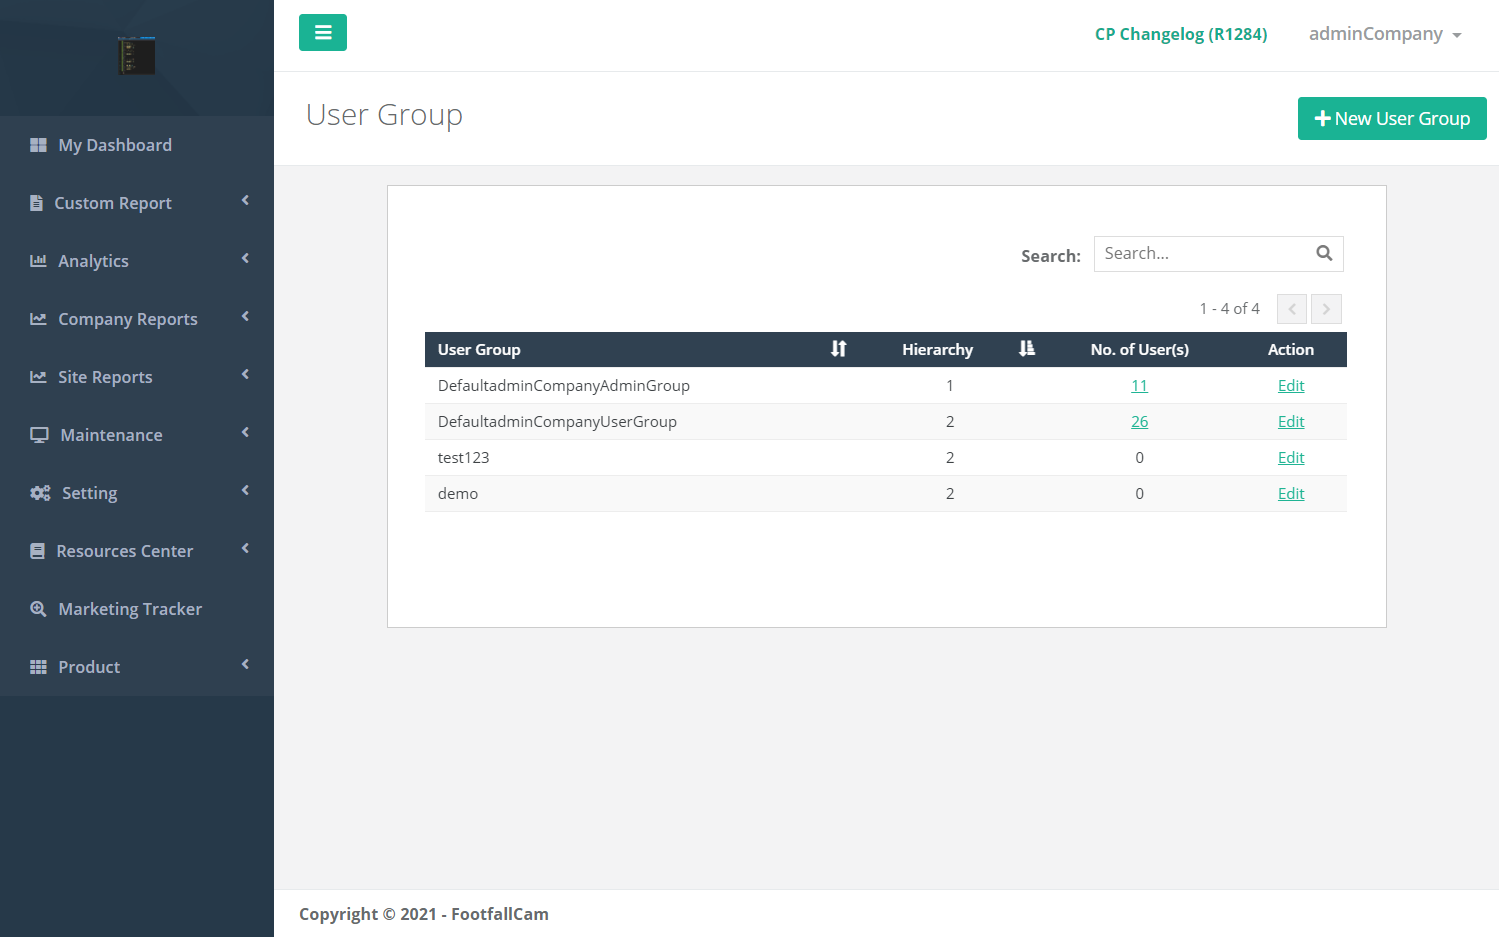
| Item | Description |
| 1. Search | Filter the table by User Group and Hierarchy. |
| 2. User Group | User group name. |
| 3. Hierarchy | Hierarchy of the user group. |
| 4. No. of User(s) | The number of users linked with the user group. Click to access the User Accounts page with the user list linked to the user group. |
| 5. Action | Edit user group settings. |
STEP 1 - Click on Setting > User Group to access the User Group page.
STEP 2 - Click on + New User Group to access the User Group Settings page.
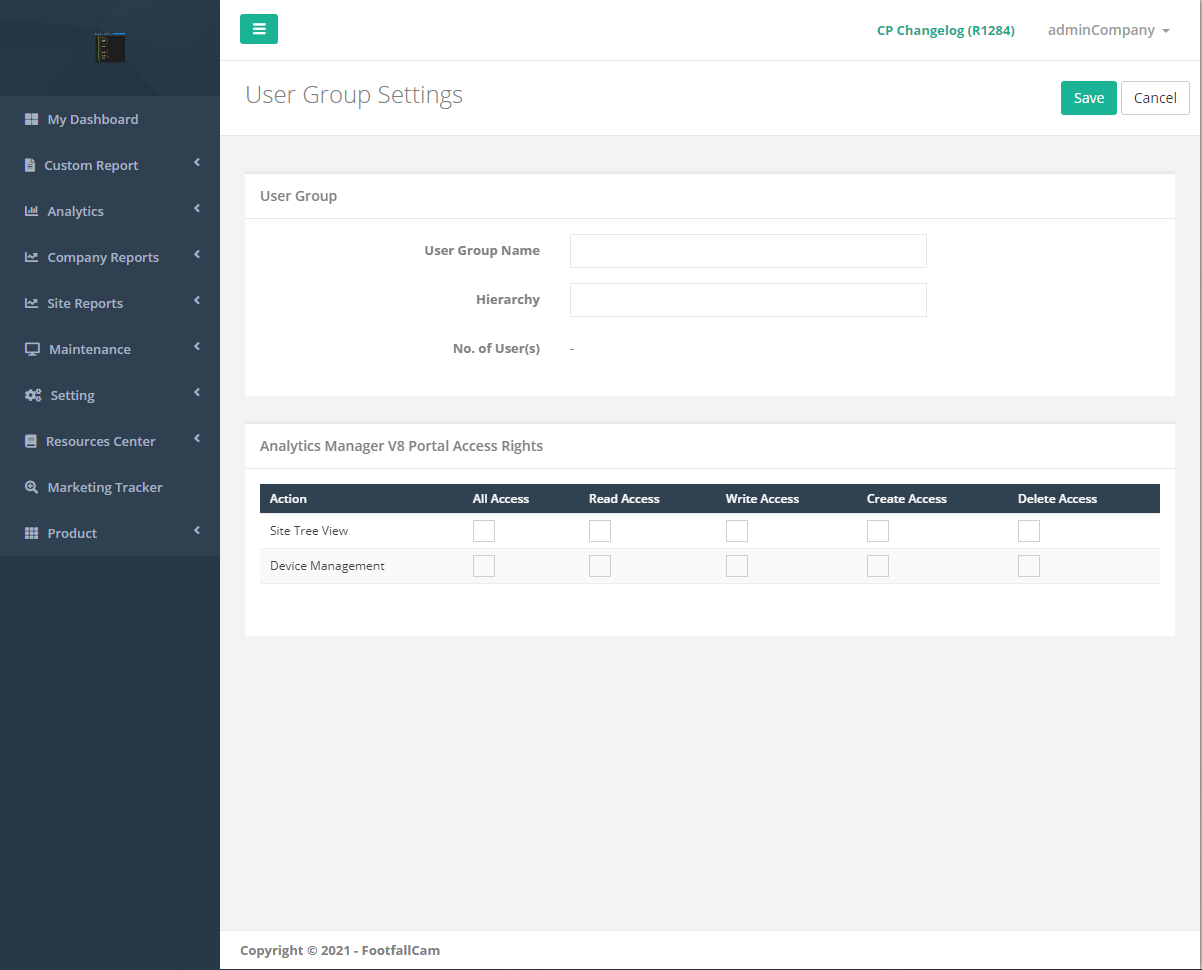
| Item | Description |
| 1. User Group Name | Enter a preferred name. |
| 2. Hierarchy | Enter a preferred hierarchy. (Info: Cannot lower than 1 since hierarchy =1 is the DefaultAdminGroup.) |
| 3. No. of User(s) | The number of users linked with the user group. Click to access the User Accounts page with the user list linked to the user group. |
| 4. Analytics Manager V8 Portal Access Rights | Tick the preferred accesses allowed for this user group with the preferred action views. |
STEP 3 - Complete the process by entering all the required fields and click on the Save button.
5.1.2 Update User Group
STEP 1 - Click on Setting > User Group to access the User Group page.
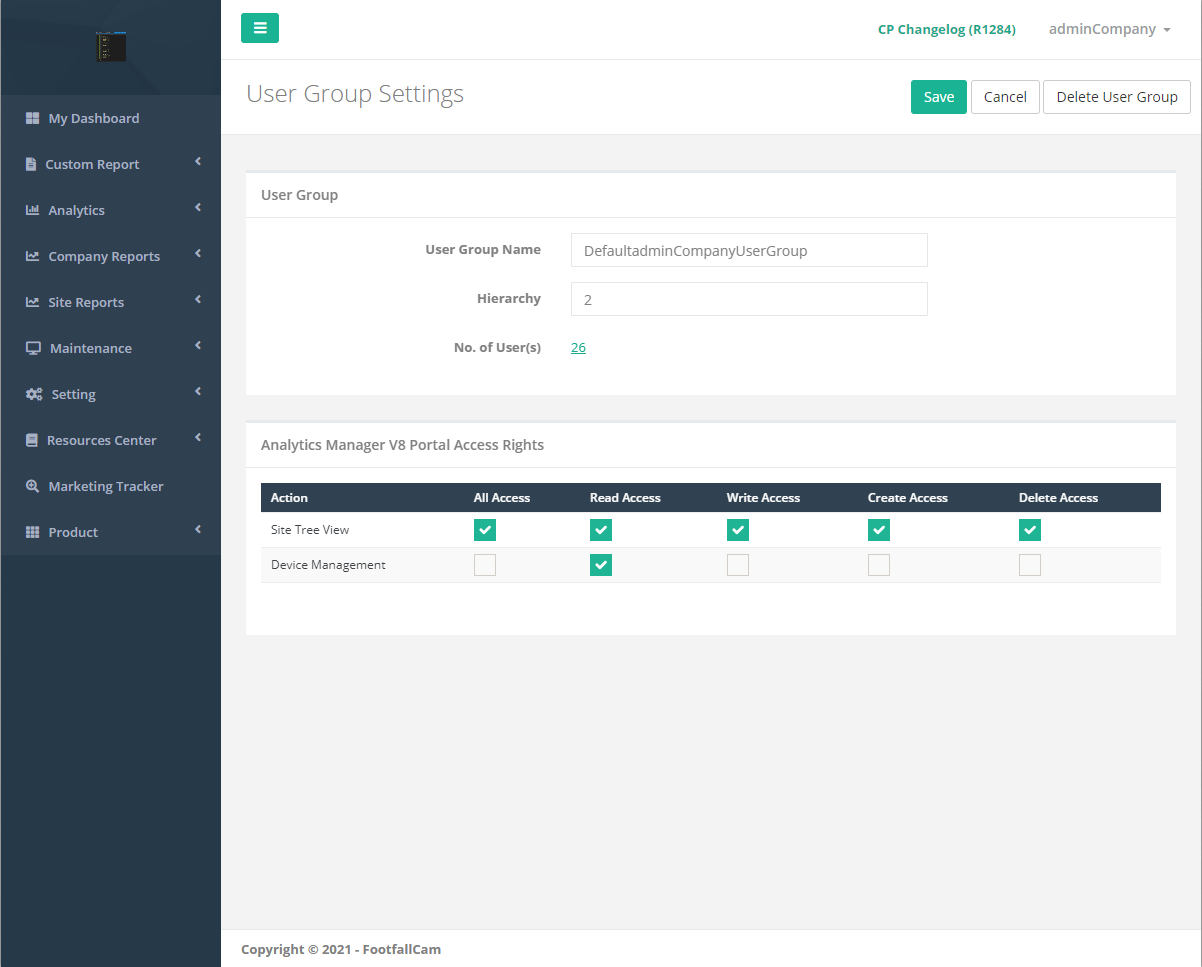
STEP 2 - Click on Edit to access the User Group Settings page.
STEP 3 - Complete the process by entering all the required fields and click on the Save button.
5.1.3 Delete User Group
STEP 1 - Click on Setting > User Group to access the User Group page.
STEP 2 - Click on Edit to access the User Group Settings page.
STEP 3 - Click on the Delete User Group button and Confirm button to delete the user group.
5.2 User Setting (DefaultAdminGroup)
5.2.1 Create User
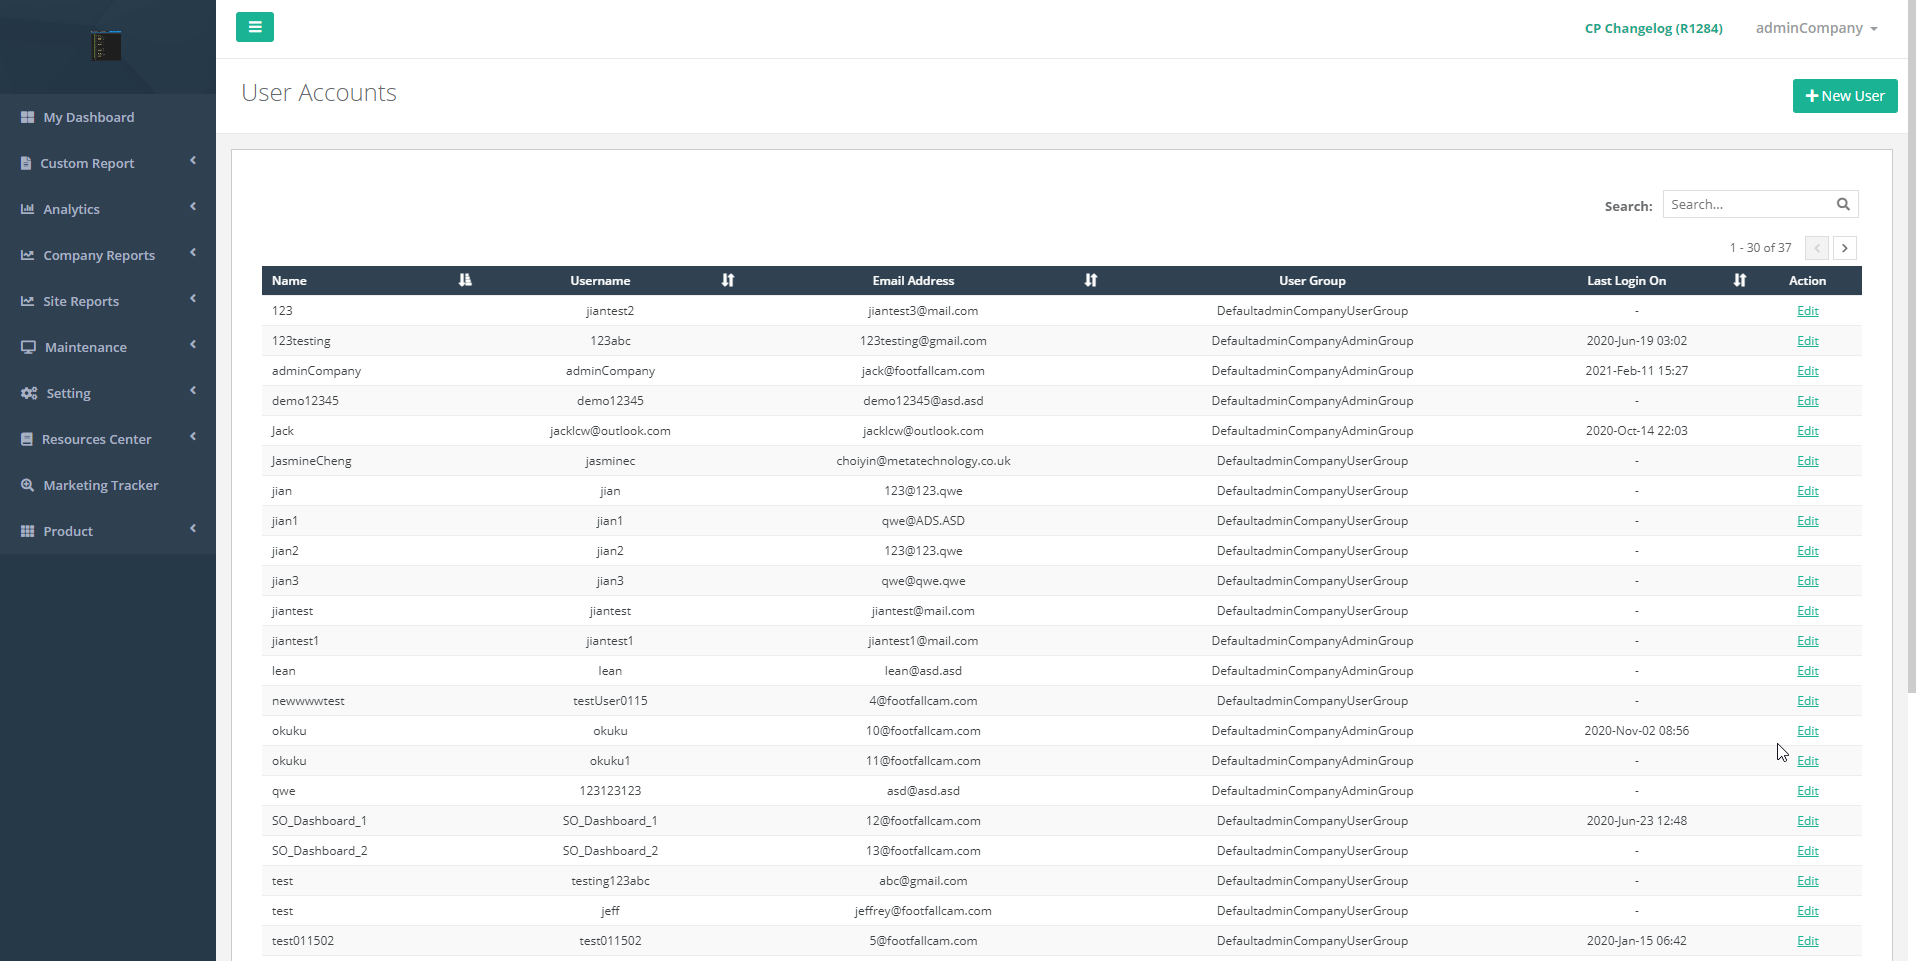
| Item | Description |
| 1. Search | Filter the table by Name, Username, Email Address and User Group. |
| 2. Name | User's display name. |
| 3. Username | User account's username. |
| 4. Email Address | User's email address. |
| 5. User Group | User linked user group name. |
| 6. Last Login On | User's last login date time. |
| 7. Action | Edit user settings. |
STEP 1 - Click on Setting > User Accounts to access the User Accounts page.
STEP 2 - Click on + New User button to access the User Settings page.
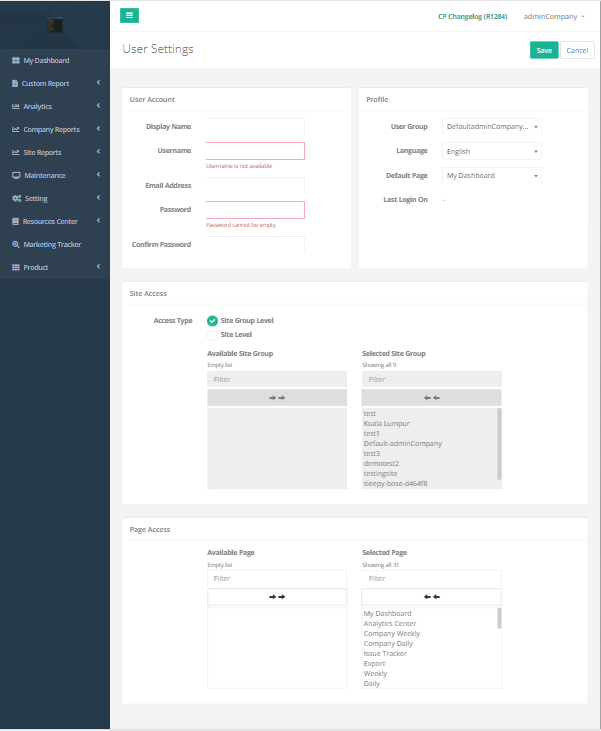
| Item | Description |
| 1. Display Name | Enter a preferred display name. |
| 2. Username | Enter a preferred username. (Info: Used to login account.) |
| 3. Email Address | Enter a preferred email address. (Info: Confirmation email will be sent to the email address.) |
| 4. Password | Enter a preferred password. |
| 5. Confirm Password | Enter to confirm the password field entered. |
| 6. User Group | Select the preferred user group. (Info: If DefaultAdminGroup is selected, the access type is auto-selected to Site Group Level and all Site Groups are selected to allow access) |
| 7. Language | Select a preferred language. |
| 8. Default Page | Select the default landing page upon the user login. |
| 9. Last Login On | Show the user's last login date time. |
| 10. Site Access Type | Select the preferred site access type. (Info: If DefaultAdminGroup is selected, the access type is auto-selected to Site Group Level and all Site Groups are selected to allow access) |
| 11. Site Group Dual List (Site Group Level Access) |
Select the list of site groups that allow the user to access. |
| 12. Site Dual List (Site Level Access) |
Select the list of sites that allow the user to access. |
| 13. Page Access Dual List | Select the list of pages that allow the user to access. |
STEP 3 - Complete the process by entering all the required fields and click on the Save button.
5.2.2 Update User
STEP 1 - Click on Setting > User Accounts to access the User Accounts page.
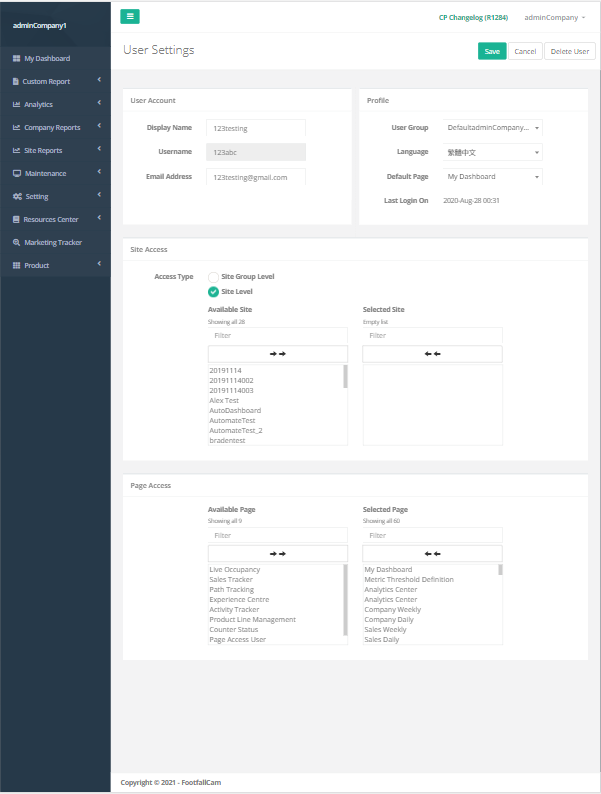
STEP 2 - Click on Edit to access the User Settings page.
STEP 3 - Complete the process by entering all the required fields and click on the Save button.
5.2.3 Delete User
STEP 1 - Click on Setting > User Group to access the User Group page.
STEP 2 - Click on Edit to access the User Settings page.
STEP 3 - Click on the Delete User button and Confirm button to delete the user account.
5.3 User Setting (User)
5.3.1 Update User Profile
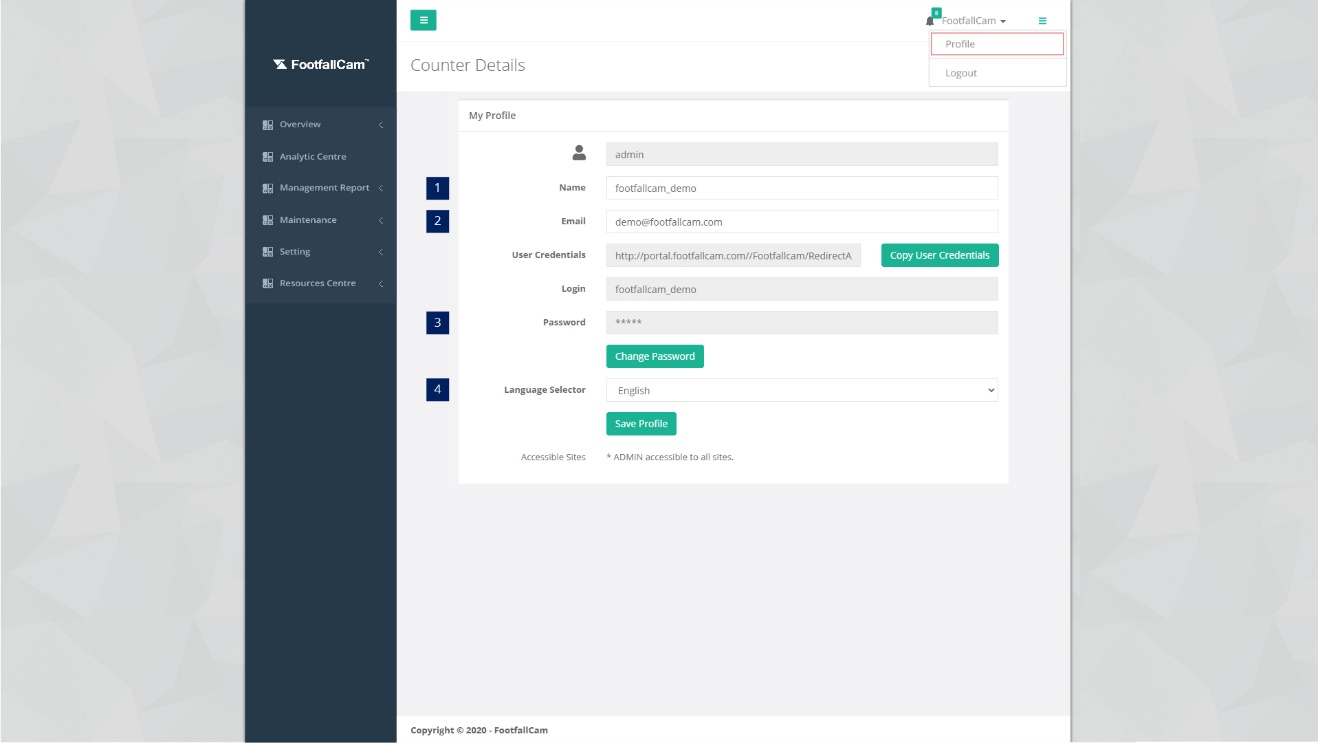
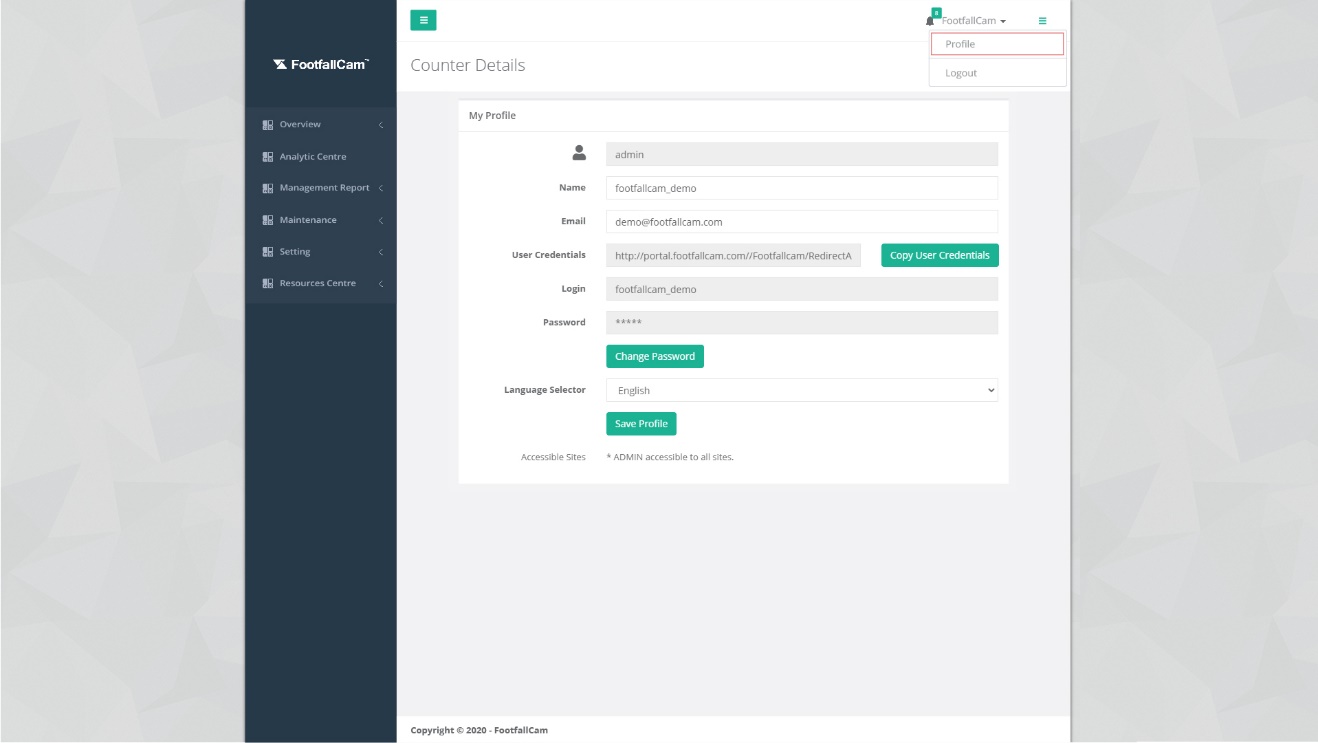
STEP 1 - Click on your username on top right and select Profile.
STEP 2 - Update the required fields and click on Save Profile.
| Item | Description |
| 1. Name | Enter a preferred name. |
| 2. Email | Enter a preferred email address.
(Info: Confirmation email will be sent to the email address.) |
| 3. Password | Click on Change Password to reset password. |
| 4. Language Selector | Select the preferred language. |
5.3.1 Delete User Profile
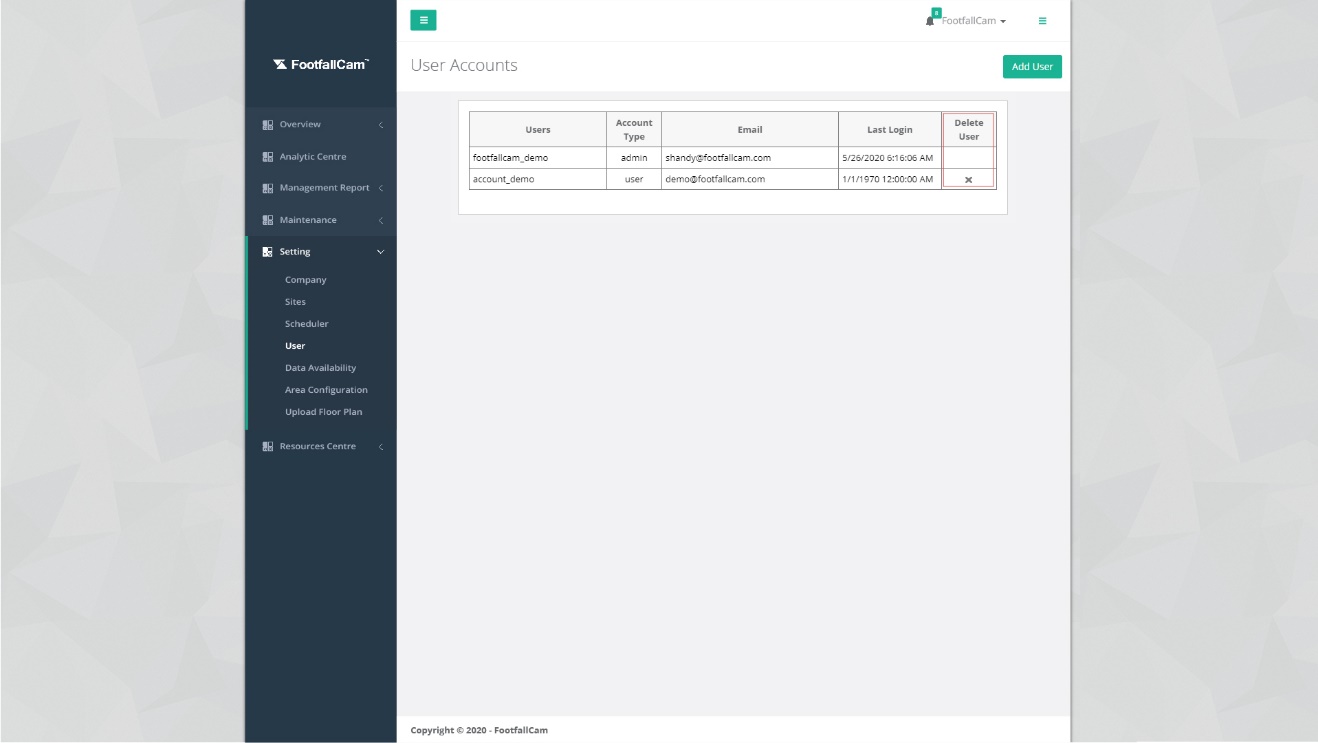
STEP 1 - Click on Setting > Users to access the User Account page.
STEP 2 - Click on X under the Delete User column to delete a registered user.
STEP 3 - Click on Delete User on the pop-out confirmation to complete the process.
5.4 Forgot Login Password
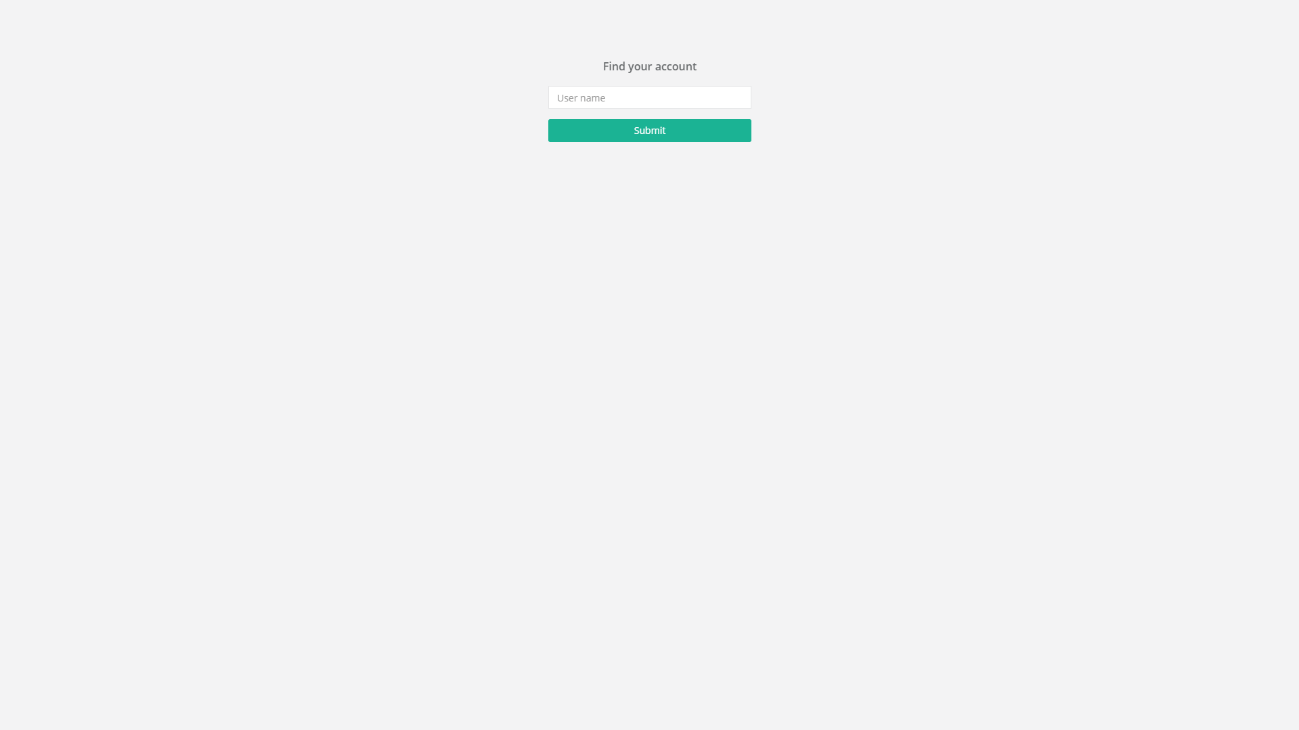
STEP 1 - Access to FootfallCam Analytic Manager V8™: http://portal.footfallcam.com/Account/ForgotPassword.
STEP 2 - Enter your username and click on Submit.
STEP 3 - Check your inbox for new password generated by FootfallCam server.
STEP 4 - Access to FootfallCam Analytic Manager V8™: http://portal.footfallcam.com/Account/Login with new generated password.
STEP 5 - Click on your username on top right and select Profile.
STEP 6 - Click on Change Password and enter your preferred password.
STEP 7 - Click on Save to complete the process.